You’ll master volume lash extensions by starting with quality tools – grab those precision tweezers and quick-set adhesives! Perfect your fan creation using techniques like pinching and flower bouquet methods while maintaining proper humidity between 45-60%. Focus on mastering isolation with dual tweezers, and don’t forget to customize your mapping for different eye shapes. Trust me, with practice and patience, you’ll be crafting stunning volume sets that’ll make your clients’ eyes pop – and there’s so much more to investigate.
Key Takeaways
- Start with proper isolation techniques using dual tweezers – one for separation and another for precise extension application.
- Master fan creation through pinching, flower bouquet, or shimmy methods to achieve symmetrical volume sets.
- Control adhesive application by maintaining optimal humidity and using correct coverage limits to prevent clumping.
- Create customized lash maps based on client’s eye shape to enhance their natural features effectively.
- Practice proper tool handling with precision tweezers and premium adhesives while maintaining clean, organized workspace.
Essential Tools and Materials for Volume Lashing
Success in volume lashing starts with having the right tools at your fingertips – trust me, I learned this the hard way!
Having the right tools is essential for volume lashing success – a lesson many learn through costly trial and error.
When I initially began, I skimped on material selection and quickly realized that quality makes all the difference.
Your crucial tools include precision tweezers (I recommend investing in at least two pairs!), premium adhesives that set quickly, and different lash extension types to suit various clients.
You’ll also need curved isolation tweezers, eye pads, and tape – and don’t forget a proper lash cleanser!
The right tools aren’t just supplies; they’re your ticket to stunning, professional results.
Understanding Volume Fan Creation Techniques
While mastering volume fan creation may seem daunting at the outset, I’ve found there are several techniques that’ll help you create those perfect, fluffy fans – and trust me, I’ve tried them all!
Let me walk you through my favorite methods that’ll transform your lashing game.
From the precise control of the pinching method (my go-to for achieving perfect fan symmetry!) to the natural spread of the flower bouquet technique that works wonders with flexible lashes, you’ll uncover what works best for your style.
I particularly love the shimmy method when I’m aiming for those gorgeous Russian volume sets – it’s like doing a tiny lash dance!
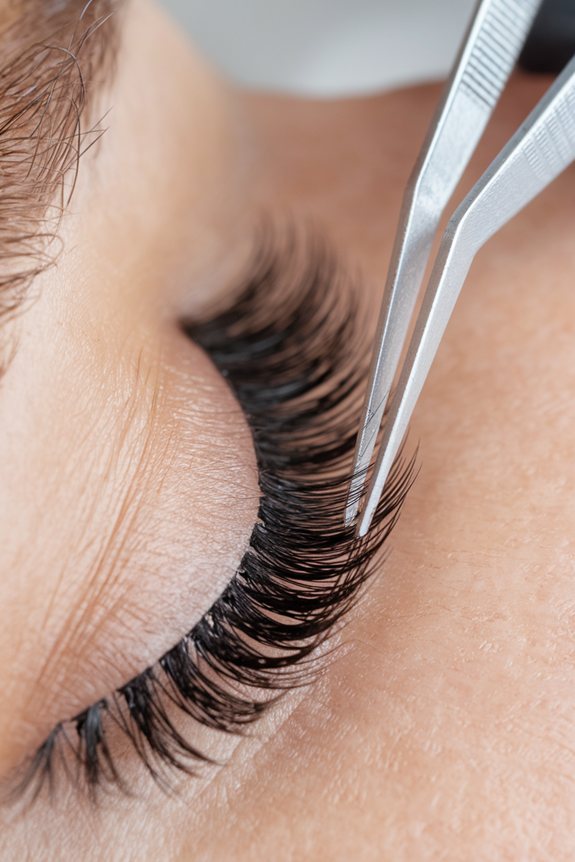
Proper Lash Isolation and Separation Methods
Because proper isolation can make or break your lash extensions, I’ve developed some foolproof techniques that’ll revolutionize your application process!
Let’s tackle those tricky isolation challenges head-on with my favorite dual tweezer techniques. You’ll want to use one tweezer to separate natural lashes while the other applies extensions – trust me, it’s a game-changer!
Keep your humidity between 45-60%, and don’t forget to section those lashes with medical-grade tape (your clients will thank you!).
Mastering Adhesive Application and Control
Proper adhesive application sits at the heart of creating stunning volume lash extensions – and trust me, I’ve learned this through countless hours of trial and error!
You’ll want to master adhesive viscosity management by maintaining ideal humidity control between 45-60% – it’s like baking the perfect cake, everything needs to be just right!
When applying adhesive, remember to swipe or scoop depending on your placement technique.
I learned the hard way that over-dipping leads to clumpy disasters! Keep your coverage to 1.5mm, use the shimmy technique to distribute excess glue, and always let those bonds cure fully before moving on.
Your clients will thank you!
Advanced Fan Placement and Positioning
Once you’ve mastered adhesive control, it’s time to plunge into the art of fan placement – and let me tell you, this is where the magic really happens!
Understanding different placement positions and fan rotation techniques will transform your volume sets from good to absolutely gorgeous.
For truly stunning results, focus on these game-changing placement positions:
- Top placement for those stubborn downward-growing lashes
- Bottom placement to tame those upward curves
- Side placement when working with sparse areas
- Layered placement for dramatic volume
- Corner placement using shorter fans for stability
Creating Custom Lash Maps for Different Eye Shapes
Creating custom lash maps might seem intimidating initially, but I’ve found that three key factors make all the difference – eye shape, face structure, and the client’s desired look.
When you’re conducting your eye shape analysis, pay close attention to whether you’re working with almond, round, hooded, or monolid eyes. Each type needs its own special approach!
For instance, I love using doll-eye mapping for monolids to create that gorgeous lift, while almond eyes are perfect for either cat-eye or doll-eye styles.
Just remember, what works beautifully on one client mightn’t suit another – that’s where your artistry comes in!
Speed and Efficiency in Volume Application
Three game-changing techniques have revolutionized my volume lash application speed, and I can’t wait to share them with you!
Let’s transform your workflow into a speedy application powerhouse. Initially, master the shimmy method – it’s a total game-changer for creating quick Russian volume fans!
For an efficient workflow, always keep these fundamental items within arm’s reach:
- Pre-shake your adhesive (trust me, it makes a difference!)
- Organize lashes by length and thickness
- Set up proper lighting – no squinting allowed
- Keep humidity monitor visible
- Position isolation tweezers at your dominant hand
Remember to refresh your adhesive every 15 minutes – I learned that one the hard way!
Safety Protocols and Hygiene Standards
While mastering volume lash techniques is fundamental, maintaining pristine safety and hygiene standards will truly set you apart as a professional artist! Let’s explore the vital safety measures that’ll protect both you and your clients.
| Safety Area | Must-Do’s | Why It Matters |
|---|---|---|
| Tool Care | Sterilize & store properly | Prevents infections |
| Workspace | Daily disinfection | Creates trust |
| Client Safety | Medical screening | Avoids reactions |
| Products | Check expiration dates | Guarantees results |
Building Your Volume Lash Portfolio
A stunning portfolio speaks volumes about your artistry and expertise in the lash extension world!
Let’s explore portfolio diversification strategies that’ll make your work shine. Start by capturing high-resolution before-and-after photos of different techniques you’ve mastered.
- Document classic, hybrid, and volume sets
- Showcase a range of eye shapes and styles
- Include close-up shots highlighting fan precision
- Feature seasonal and trending looks
- Add client testimonials with photos
Advanced Volume Techniques and Styling
Once you’ve mastered the basics of lash extensions, stepping into advanced volume techniques opens up an incredible world of artistry! Let’s investigate today’s hottest lash trends and how to perfect those stunning mega-volume sets your clients are craving.
| Technique | Best For | Pro Tips |
|---|---|---|
| Russian Volume | Dramatic looks | Use 0.07mm for beginners |
| Hybrid Sets | Natural fullness | Mix 50/50 classic/volume |
| Mega Volume | Maximum drama | Stick to 0.03mm diameter |
| Textured Classic | Subtle improvement | Perfect for client consultations |
Remember to assess each client’s natural lashes carefully – your expert eye during consultations will help determine which technique will give them those head-turning results they’re dreaming of!
Frequently Asked Questions
How Long Does a Complete Volume Lash Course Typically Take to Finish?
You’ll complete your volume lash course in a standard 2-day training schedule, dedicating 6-8 hours daily. The course duration includes hands-on practice, business planning, and certification completion.
Can Pregnant Clients Safely Receive Volume Lash Extensions?
You’ll need to carefully evaluate pregnancy safety for each client. While lash extensions aren’t strictly prohibited, consider increased sensitivity, positioning challenges, and potential reactions before proceeding with treatment.
What Should I Do if a Client Experiences an Allergic Reaction?
Immediately remove the extensions if you notice allergy symptoms. Apply cold compresses, recommend antihistamines, and provide client aftercare instructions. Document the reaction and refer them to medical care if needed.
How Much Should I Charge for Different Types of Volume Sets?
Research your local market’s pricing strategies and conduct competitive analysis. You should charge $80-100 for beginner Volume sets, $179-199 for standard Volume, and $219-239 for Mega Volume services.
When Should I Replace My Volume Lash Tweezers for Optimal Performance?
Replace your tweezers when you notice rust, bent tips, loose handles, or grip issues during isolation. With proper tweezer maintenance, you’ll need replacement every 6-12 months depending on usage and performance indicators.
Conclusion
You’ve now got all the tools to become a volume lash extension pro! Remember to practice your fan-making techniques daily, maintain strict hygiene protocols, and never stop learning new styles. With dedication and patience, you’ll develop the confidence to create stunning sets that’ll have your clients coming back again and again. Trust me, there’s nothing more satisfying than seeing those perfect fans bloom under your skilled hands!